Oggi vi mostro un mini album che ho fatto a settembre per un compleanno. Era per una donna adulta, ma quando l'ha visto sua figlia voleva quasi tenerselo per sé. Per questo qualche giorno dopo ho creato un piccolo regalo di consolazione per la figlia che vi mostrerò presto.
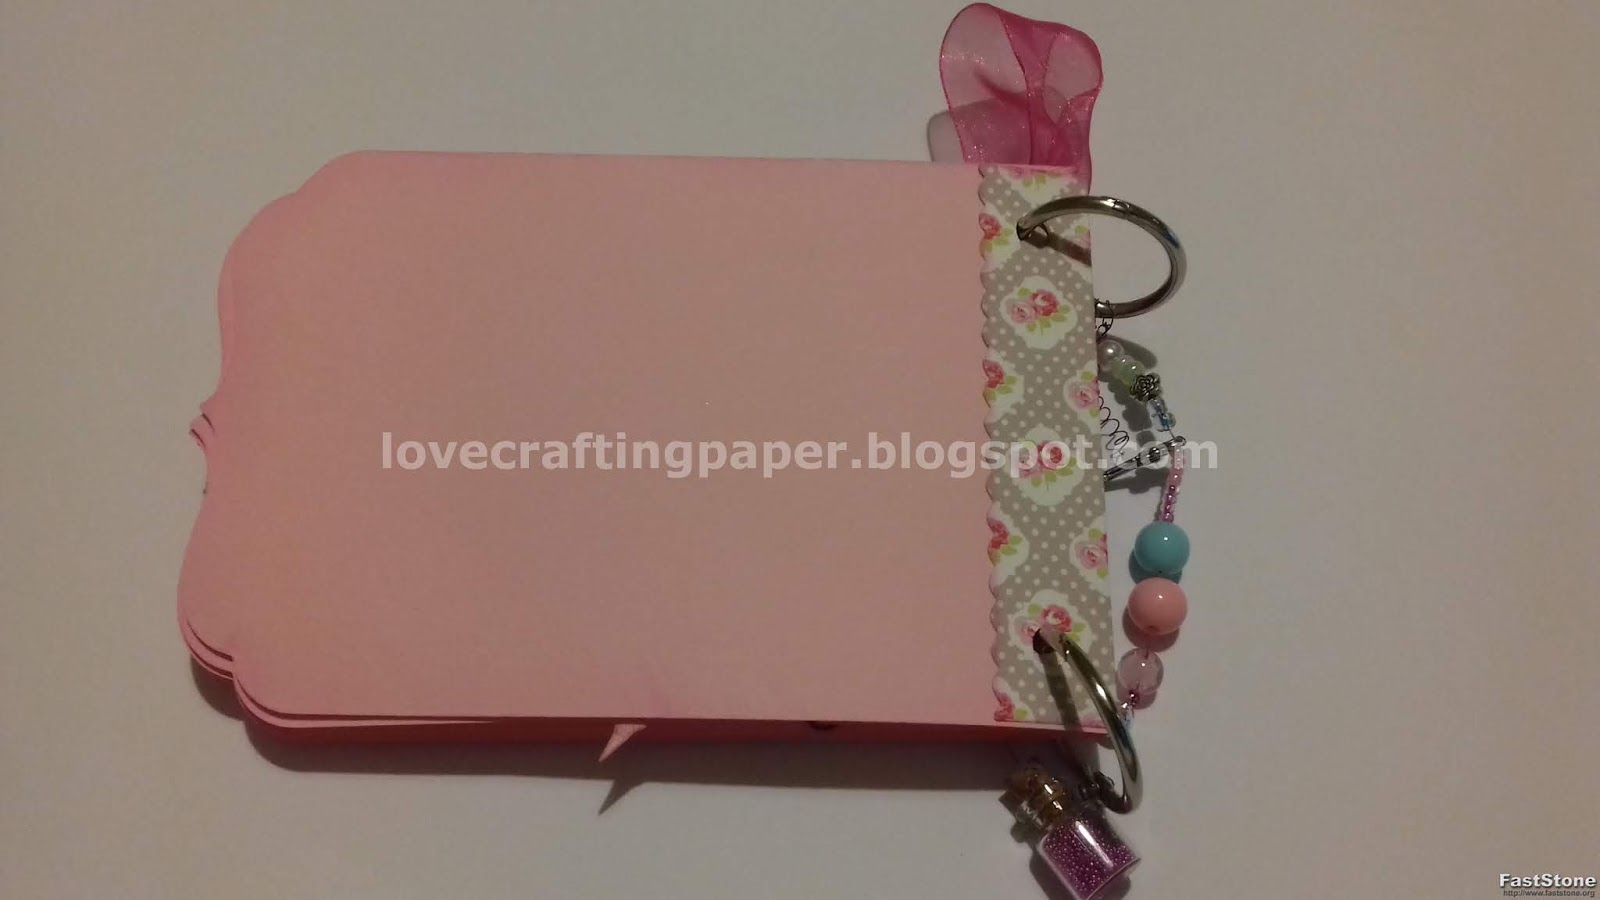
I colori principali delle carte sono il rosa e il celeste, con qualche tocco di verde, che ho ripreso per fare la scatola.
Dopo le foto dell'album vedrete un mini tutorial fotografico sulle fasi di realizzazione.
Good morning everybody!
Today I'm showing you a mini album I made in September for a birthday. The recipient was an adult, but when her teen age daughter saw it she wanted to keep it for herself. This is why a few days later I create a small consolation gift for her daughter that I'll show you soon.
The main colours of these design papers are pink and light blue, with some touches of green - I used this last colour to make the box.
After the photos of the album you will see a short photo tutorial on the crafting steps.


1-2


3-4


5-6


9-10


10

11-12

Le foglie sono tono su tono con la scatola, perciò ho sfumato i bordi con un tampone di inchiostro per definirli meglio. Non volevo usare un altro verde per evitare l'uso di troppi colori, visto che questi sono già molto accesi.
The leaves are of the same green as the box, so I shaded the edges with an inkpad to define them better. I didn't want to use another green to avoid using too many colours, as these ones are bright.


Per fare questa farfalla prima l'ho fustellata nel cartoncino e ho messo della colla sul retro per evitare di perdere i pezzetti, poi vi ho incollato sopra solo il corpo di una seconda fustellata fatta di una specie di acetato celeste trasparente. Da quest'ultima avevo precedentemente eliminato i pezzetti interni. Piegando leggermente le ali della farfalla di acetato rispetto al corpo si distanziano le ali delle due farfalle e si dà l'impressione di un battito di ali.
To make this butterfly I have first die-cut it in cardboard and I put some glue on the back in order not to lose the small pieces. Then I glued on it only the body of another butterfly I had die-cut in light blue - transparent acetate. I had previously removed the small pieces of the second butterfly. If you fold slightly the wings of the second butterfly from its body, you will space out the wings of the two butterflies and you get a wingbeat effect.


È la prima volta che uso questa fustella con i cerchi. La adoro! Ne ho tagliate e tenute da parte in diversi colori e ho conservato anche i pezzi interni. Penso di riempire qualche cerchio con lo stesso colore o con un colore in contrasto in qualche altra creazione.
It is the first time I use this circles dies. I love it! I have die-cut and kept some in different colours and I have kept also some of the small pieces. I think in some of my next crafts I will fill up some of the circles with the same colour or a different one.


Questa è la micro tag che ho appeso al sacchetto di carta che conteneva la scatola.
This is the tiny tag I hung on the paper bag contaning the box.


Potete vedere come ho creato queste sfumature di colore nel post Mini album Rosa fiori e farfalle
Aggiungete della polvere per ottenere maggiore brillantezza. Guardate la differenza tra i due fiori.
You can see how I created these nuances in the post Flowers and butterflies pink mini album
Add some powder if you want them more sparkling. Look at the difference between the two flowers.


Sfide / Challenges:
Avenue613, Challenge #226, ATG w/option Spotlight technique (Sparkling powder on inked flowers)
Craftycatz, Challenge #480, ATG
Craftycreations, Challenge #401, ATG
Cutecardthursday, Challenge #605, Sparkles!
Notjustcards, 11th October challenge, ATG
Penny Challenges, Challenge #454, ATG
Pink Gem Challenge, Challenge #21, ATG
Ttcrd, 29th October challenge, ATG
Pink Gem Challenge, Challenge #21, ATG
Ttcrd, 29th October challenge, ATG
