oggi vi mostro un piccolo regalo che ho fatto per la figlia di una mia amica. Si è laureata da poco, così ho scelto delle carte sulle lettere d'amore per sviluppare il tema della scrittura.
Come sempre alla fine del post vedrete un breve tutorial fotografico.
Good afternoon, folks,
today I show you a small gift I made for a friend of mine's daughter. She got a degree recently, so I chose some patterned papers on love letters to develop the theme of writing.
As usual, at the end of the post you will see a short photo tutorial.
1
2-3
4-5
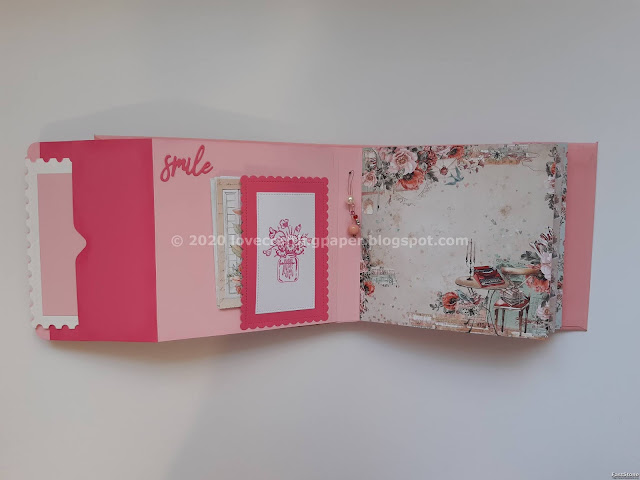
A pagina 5 e 6 ho timbrato queste rose con un cuscinetto rosa e le ho embossate con la polvere trasparente. A pagina 5 ho aggiunto un bordo merlettato che ho fustellato nel cartoncino rosa. Questa pagina è una tasca che contiene alcune tag per incollare altre foto.
At pages 5-6 I stamped these roses with a pink inkpad and embossed them with clear powder. At page 5 I added a lacy border I die cut from pink cardstock. This page is a pocket containing some tags where she can put more photos.
Ho fustellato queste quattro tag e vi ho timbrato sopra delle immagini con dei cuscinetti rosa e bianchi, poi le ho embossate rispettivamente con la polvere trasparente e perla.
Ultimamente ho usato molto questa polvere perla, che trovo molto elegante.
I die cut these four tags and I stamped some images on them with pink and white inkpads. I embossed them with clear and pearl powder. These weeks I am using a lot this pearl powder. I find it very elegant.
6-7
Le pagine 7 e 8 le ho fatte con un foglio di sughero.
I made pages 7-8 with a cork sheet.
8-9
A pagina 9 ho creato due tasche in cui ho messo due tag che ho creato con delle fustelle a forma di francobollo.
At page 9 I made two pockets where I put two tags I created with a postage stamp die.
Davanti...
Front...
... e dietro.
... and back.
Ho fustellato queste due scritte e quella che vedrete nella pagina successiva due volte e ho incollato ogni pezzo sull'altro per dare tridimensionalità.
I die cut these sentiments and the one you will see on the following page twice and glued each die cut on another to give dimension.
10-11
Molti dei timbri che vedete in questo lavoro li ho usati anche nel micro album della scatolina-libro e i mini libri 4 pagine.
I used many of the stamps you see in this work to make the tiny album of the book-box and the 4 pages tiny albums.
12-13
Tutti questi pezzi - il cesto e i fiori - li ho colorati con i cuscinetti Distress.
I coloured all these pieces - the basket and the flowers - with Distress inkpads.
Anche per queste rose ho usato la polvere perla.
I used the pearl powder to emboss these roses, too.
Ho fustellato e timbrato altre quattro tag.
I die cut and stamped four more tags.
14-15
Ho timbrato la macchina da scrivere, e gli altri elementi decorativi, che ho colorato con i pennarelli acquerellabili.
I stamped the type machine and the other decorations, that I coloured with watercolour markers.
16-17
18-19
Ho fustellato questi elementi e li ho colorati con i Distress.
I die cut these elements and coloured them with Distress inkpads.
20
Anche per queste cornici ho fustellato in totale nove pezzi.
To make these frames too I die cut nine pieces.
Qui sotto vi mostro la tag che ho fatto per chiudere il sacchetto. Ho fustellato parecchi petali nel cartoncino bianco e li ho colorati con i Distress. I fiori più piccoli li ho tagliati con delle perforatrici.
You will see below the tag I made to close the bag. I die cut many petals and coloured them with Distress inkpads. I punched the smaller flowers.
Ecco le misure dell'album.
Here are the album sizes.
Ho aggiunto un sacchetto con alcuni piccoli elementi che Sophia potrà usare per decorare l'angolo di qualche foto.
I added a small bag with some elements Sophia can use to decorate some photos' corners.
I fiori e le foglie li ho colorati con i pennarelli acquerellabili e tagliati con fustelle di diversi set.
Per fare le micro-lettere ho fustellato le due parti nel cartoncino bianco e rosso e poi ho inserito i cuori nelle lettere.
I coloured the flowers and leaves with watercolour markers and cut them with small dies from different sets.
To make the tiny letters I die cut the two parts from white and red cardstock and then inlayed the tiny hearts in the letters.
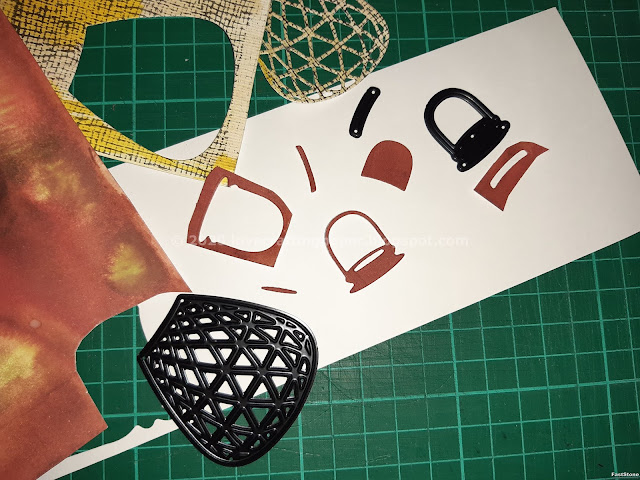
Ecco la fustellina della lettera.
Here's the tiny letter die.
Queste sono le micro perle rosse che ho messo nella bottiglietta.
These are the red tiny pearls I put inside the bottle.
Ho usato il negativo per posizionare bene questa fustellata lunga.
I used the negative to place well this long die cut.
Spero che quest'album vi sia piaciuto!
I hope you like this album!
Sfide / Challenges:
Ally's Angels, Challenge #36, ATG
Carabbie Creative Moments, Challenge #195, ATG
Craftysentiments, 28th July challenge, ATG
Cutecardthursday, Challenge #645, TagsKraftychickschallenge, Challenge #518, ATG
Lemonshortbread, Challenge #125, ATG
Minialbummakers, 1st July challenge, ATG
Notjustcards, 11th July challenge, ATG
Pennyschallenges, Challenge #476, ATG
Simonsaysstampblog, 29th July challenge, ATG
Thecreativecrafterschallenge, Challenge #30, ATG
Ttcrd, 28th July challenge, ATG
Tuesdaythrowdown, Challenge #462, Favourite embellishments (flowers)
Wordartwednesday, Challenge #450-451, ATG


